Data Visualization
Alison Presmanes Hill
September 29, 2016
1 Install R
R is a programming language based off of S from Bell Labs. R is:
- Free
- Open source
- Available on almost every major platform
Install R from CRAN, the Comprehensive R Archive Network. Please choose a precompiled binary distribution for your operating system.
- If you need more help, check out one of the following videos (courtesy of Roger Peng at Johns Hopkins Biostatistics):
- If you need even more help, read this step-by-step guide, including screenshots.
2 Test R
Launch R. You should see one console with a command line interpreter (>).
- Place your cursor where you see
>and typex <- 2 + 2, hit enter or return, then typex, and hit enter/return again. - If
[1] 4prints to the screen, you have successfully installed R. - Close R.
3 Install RStudio
RStudio provides a nice user interface for R, called an integrated development environment. RStudio includes:
- a console (the standard command line interface:
>), - a syntax-highlighting editor that supports direct code execution, and
- tools for plotting, history, debugging and workspace management.
Install the free, open-source edition of RStudio: http://www.rstudio.com/products/rstudio/download/
4 Test RStudio
Launch RStudio. You should get a window similar to the screenshot you see here, but yours will be empty.
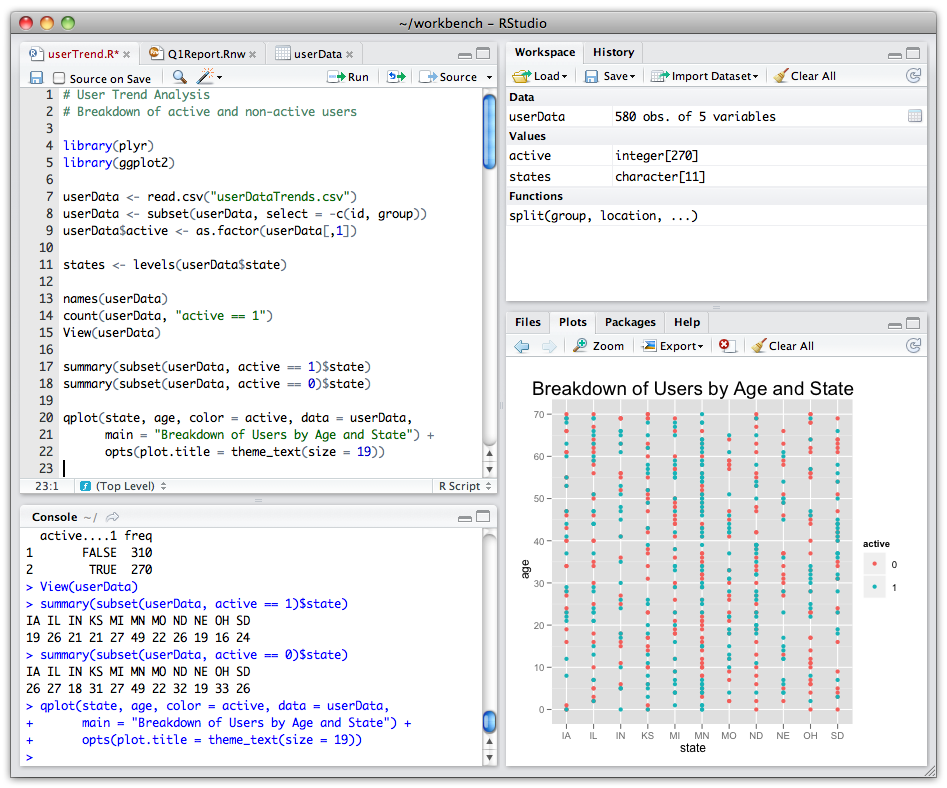
- Place your cursor where you see
>and typex <- 2 * 2, hit enter or return, then typex, and hit enter/return again. - If
[1] 4prints to the screen, you have successfully installed RStudio.
5 Use R Markdown
R Markdown documents are documents that combine text, R code, and R output, including figures. They are a great way to produce self-contained and documented statistical analyses. Create a new R Markdown file in RStudio and try to do some basic markdown editing. After you have made a change to the document, press "Knit HTML" in R Studio and see what kind of a result you get.
5.1 Basic Markdown editing
Try out basic R Markdown features, as described here. Write some text that is bold, and some that is in italics. Make a numbered list and a bulleted list. Make a nested list. Try the block-quote feature.
5.2 Embedding R code
R code embedded in R chunks will be executed and the output will be shown.
x <- 5
y <- 7
z <- x * y
z[1] 35Play around with some basic R code. E.g., test that you can add comments to a code chunk by typing a # followed by some random text and show that case matters in R code.
Next, use the code included in the blank R Markdown document you started with to plot the pressure data set.
plot(pressure)
6 Install TeX
In order to use all of the great options offered within RStudio (in particular, knitting to PDF), you will need a full installation of TeX. If you don't already have TeX, this is a big download.
- Install the appropriate full TeX distribution for your OS:
7 Getting Started in R
Code you can use in R will look like this:
## This is a comment
data <- c(1, 1, 4, 1, 1, 4, 1)
data[1] 1 1 4 1 1 4 1The first box shows something you can type into the R console. The second shows what you'd see as output if you did.
7.1 Always know where R thinks you are
## Get the working directory
getwd()[1] "/Users/hillali/Documents/Teaching/OHSU/data-vis/01-lab"7.2 Everything has a name
- Some names are forbidden. These include words like
FALSEandTRUE, logical operators and programming words likeInf,for,else,break,function, and words for special entities likeNAandNaN. - Some names you should not use. These include words that are also the names of very widely used objects like
qorcormean, orpi, orrange, orvar. - All names are case sensitive.
7.3 Everything is an object
- Objects are built in to R, are added via libraries, or are created by the user.
letters # letters [1] "a" "b" "c" "d" "e" "f" "g" "h" "i" "j" "k" "l" "m" "n" "o" "p" "q"
[18] "r" "s" "t" "u" "v" "w" "x" "y" "z"pi # pi[1] 3.141593iris # datasets in `datasets` package like irisSource: local data frame [150 x 5]
Sepal.Length Sepal.Width Petal.Length Petal.Width Species
(dbl) (dbl) (dbl) (dbl) (fctr)
1 5.1 3.5 1.4 0.2 setosa
2 4.9 3.0 1.4 0.2 setosa
3 4.7 3.2 1.3 0.2 setosa
4 4.6 3.1 1.5 0.2 setosa
5 5.0 3.6 1.4 0.2 setosa
6 5.4 3.9 1.7 0.4 setosa
7 4.6 3.4 1.4 0.3 setosa
8 5.0 3.4 1.5 0.2 setosa
9 4.4 2.9 1.4 0.2 setosa
10 4.9 3.1 1.5 0.1 setosa
.. ... ... ... ... ...Note that I am only showing the first few lines of the iris dataset here.
## This is a vector of numbers
my_numbers <- c(1, 2, 3, 1, 3, 5, 25)
my_numbers[1] 1 2 3 1 3 5 25summary(my_numbers) Min. 1st Qu. Median Mean 3rd Qu. Max.
1.000 1.500 3.000 5.714 4.000 25.000 7.4 Every object has a class
Classes:
- Numeric
- Character
- Factor
- Logical
- Double (
?double: "identical to numeric", but "double precision") - Closure (a function)
a few others you may run into
?typeofDepending on what type of object something is, you can extract bits of information from it.
class(my_numbers)[1] "numeric"class(summary)[1] "function"typeof(my_numbers)[1] "double"typeof(summary)[1] "closure"R denotes missing data with a special type of thing, NA, which is not a character (and hence not in quotes). It is actually a logical, which returns TRUE or FALSE.
?logical
missing <- c(NA, NA, NA)
typeof(missing)[1] "logical"is.na(missing)[1] TRUE TRUE TRUEdollars <- c(12, 1, 2, 3, NA)
typeof(dollars)[1] "double"is.na(dollars)[1] FALSE FALSE FALSE FALSE TRUEdollars*3[1] 36 3 6 9 NAmean(dollars)[1] NAmean(dollars, na.rm = TRUE)[1] 4.57.5 Functions take Data (or Functions) as inputs, and produce outputs
## A Function takes arguments inside parentheses
my_summary <- summary(my_numbers)
class(my_summary)[1] "summaryDefault" "table" my_summary Min. 1st Qu. Median Mean 3rd Qu. Max.
1.000 1.500 3.000 5.714 4.000 25.000 - For now just remember that you do things in R by creating and manipulating objects, and that you manipulate objects by feeding them to functions and getting output back as a result.
my_numbers * 2[1] 2 4 6 2 6 10 50table(my_numbers)my_numbers
1 2 3 5 25
2 1 2 1 1 sd(my_numbers)[1] 8.6161537.6 When in Doubt
7.6.1 If you're not sure what something is, ask for its class/type:
class(my_numbers)[1] "numeric"class(my_summary)[1] "summaryDefault" "table" class(table)[1] "function"typeof(my_numbers)[1] "double"typeof(my_summary)[1] "double"typeof(table)[1] "closure"7.6.2 If you're not sure what something is, ask for its structure
str(my_numbers) num [1:7] 1 2 3 1 3 5 25str(my_summary)Classes 'summaryDefault', 'table' Named num [1:6] 1 1.5 3 5.71 4 ...
..- attr(*, "names")= chr [1:6] "Min." "1st Qu." "Median" "Mean" ...str(summary)function (object, ...) 8 Let's get some Data ...
install.packages("gapminder")
head(gapminder)## What is it?
class(gapminder)[1] "tbl_df" "tbl" "data.frame"## What's inside?
str(gapminder)Classes 'tbl_df', 'tbl' and 'data.frame': 1704 obs. of 6 variables:
$ country : Factor w/ 142 levels "Afghanistan",..: 1 1 1 1 1 1 1 1 1 1 ...
$ continent: Factor w/ 5 levels "Africa","Americas",..: 3 3 3 3 3 3 3 3 3 3 ...
$ year : int 1952 1957 1962 1967 1972 1977 1982 1987 1992 1997 ...
$ lifeExp : num 28.8 30.3 32 34 36.1 ...
$ pop : int 8425333 9240934 10267083 11537966 13079460 14880372 12881816 13867957 16317921 22227415 ...
$ gdpPercap: num 779 821 853 836 740 ...## Get the dimensions of the data frame
dim(gapminder)[1] 1704 6## Another way to look at a data frame
head(gapminder)Source: local data frame [6 x 6]
country continent year lifeExp pop gdpPercap
(fctr) (fctr) (int) (dbl) (int) (dbl)
1 Afghanistan Asia 1952 28.801 8425333 779.4453
2 Afghanistan Asia 1957 30.332 9240934 820.8530
3 Afghanistan Asia 1962 31.997 10267083 853.1007
4 Afghanistan Asia 1967 34.020 11537966 836.1971
5 Afghanistan Asia 1972 36.088 13079460 739.9811
6 Afghanistan Asia 1977 38.438 14880372 786.1134Always do sanity-checks on your data after import! As in... 
8.1 ... and get ready to plot it
## Make an object containing the plot
## try str(p) if you like. Objects can be complex!
p <- ggplot(gapminder,
aes(x = gdpPercap,
y = lifeExp))## Take our data and make a scatter plot
p + geom_point()
Two key concepts in the grammar of graphics: aesthetics map features of the data (for example, the lifeExp variable) to features of the visualization (for example, the y-axis coordinate), and geoms concern what actually gets plotted (here, each data point becomes a point in the plot).
Another key aspect of ggplot2: the ggplot() function creates a graphics object; additional controls are added with the + operator. The actual plot is made when the object is printed.
The following is equivalent to the code above. The actual plot isn't created until the p2 object is printed. (When you type an object's name at the R prompt, it gets printed, and that's the usual way that these plots get created.)
p1 <- ggplot(gapminder, aes(x=gdpPercap, y=lifeExp))
p2 <- p1 + geom_point()
p2
Change x-axis to log scale
ggplot(gapminder, aes(x=gdpPercap, y=lifeExp)) +
geom_point() +
scale_x_log10()
Could have also done just this:
p2 + scale_x_log10()For a scatterplot, additional aesthetics include shape, size, and color.
For example, we might make our scatterplot for all countries, with data from 1952, and then color the points according to the continent.
gm_1952 <- filter(gapminder, year==1952)
ggplot(gm_1952, aes(x=gdpPercap, y=lifeExp)) +
geom_point() + scale_x_log10() +
aes(color=continent)
Note that we could have put color=continent within the call to ggplot(): the following is equivalent to the above.
ggplot(gm_1952, aes(x=gdpPercap, y=lifeExp, color=continent)) +
geom_point() +
scale_x_log10()
Try out the size, shape, and color aesthetics, both with categorical variables (such as continent) and numeric variables (such as pop).
9 Try this
- Create an RMarkdown file for your work if you haven't already.
- Look again at the data.
- Put
lifeExpon the x-axis andgdpPercapon the y-axis. - Plot
popon the x-axis and gdpPercap on the y-axis. - Plot
yearon the x-axis and any continuous variable on the y-axis.
10 Help
You don't have to do any of these, but if you are new to R these are some recommended resources for getting started.
10.1 Swirl
"Learn R, in R."
Swirl is an R package that turns the R console into an interactive learning environment. It stands for Statistics with Interactive R Learning. If you are new to R, you may find some of these lessons useful. You can always save your place in Swirl and come back later.
install.packages("swirl", dependencies = TRUE)
library(swirl) #once a package is installed, you must load it before using it
install_from_swirl("R Programming") #give it a second to install the course
swirl() #the program should help you take it from there! There are 15 R Programming lessons in all. 10.2 R for cats
"An intro to R for new programmers."
If you are a dog-lover (as I am), you may quickly realize that this is not the norm in the R community. Nevertheless, the site rforcats has a lot of great information, some of which overlaps with the lessons in swirl, but some of which may be new (see the no no's and the do do's, and the section on the magrittr pipe operator: %>%).
10.3 aRrgh
"a newcomer's (angry) guide to R."
Also highly recommended, especially the section on data.frames: